Thursday, July 07, 2005

Creating a Clock on your Form


Microsoft Access Database Solutions: Create a working clock on your forms

Looking for that extra special effect to give your Microsoft Access database project a professional flair...Thought about adding a working clock to your Access forms?

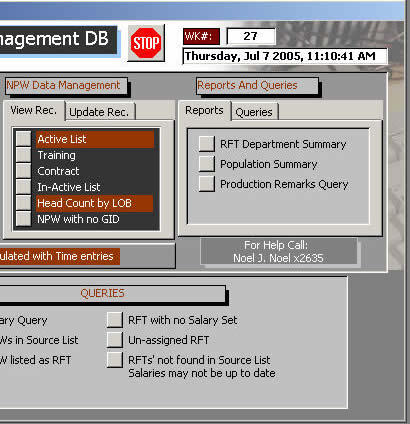
To put a simple text clock on a form, create a Label called lblClock on the form, set the form's TimerInterval to 1000, and the following code behind the Timer Event.

You can also create two command buttons called cmdClockStart and cmdClockEnd and attach respective code to each to have the clock run on demand.


'***************** Code Start ***************
Private Sub Form_Timer()
Me!lblClock.Caption = Format(Now, "dddd, mmm d yyyy, hh:mm:ss AMPM")
End Sub

Private Sub cmdClockStart_Click()
Me.TimerInterval = 1000
End Sub

Private Sub cmdClockEnd_Click()
Me.TimerInterval = 0
End Sub
'***************** Code End ***************

Monday, July 04, 2005

How to eliminate white space in reports with CanShrink and code in Access 2002

Article ID : 299011
Last Review : June 23, 2005
Revision : 5.0
This article was previously published under Q299011
For a Microsoft Access 97 version of this article, see 95390.
Moderate: Requires basic macro, coding, and interoperability skills.

This article applies to a Microsoft Access database (.mdb) and to a Microsoft Access project (.adp).

For a Microsoft Access 2000 version of this article, see 210589.

SUMMARY

Before you print a form or a report, you can save space by conditionally reducing the size of the controls on the form or report. For example, you might want to reduce the size of text boxes that contain varied-length text, or reduce the size of text boxes bound to fields that could be empty.

Before you try to reduce the size of controls in reports, however, consider the following:
Overlapping controls will not shrink, even when the CanShrink property is set to Yes.
Controls shrink line by line (vertically). This means, for example, that if there is a group of controls placed on the left side of the page and a large control (for example, an OLE picture) on the right side of the page, the controls on the left side of the page will not shrink, unless the picture is blank and hidden.
Space between controls is not affected by the CanShrink or CanGrow property.
Controls located in the page header or page footer can shrink and grow. However, the sections do not have CanGrow and CanShrink properties. This means, you can still have blank space in a page header or page footer section (even though its controls may shrink).
Microsoft provides programming examples for illustration only, without warranty either expressed or implied. This includes, but is not limited to, the implied warranties of merchantability or fitness for a particular purpose. This article assumes that you are familiar with the programming language that is being demonstrated and with the tools that are used to create and to debug procedures. Microsoft support engineers can help explain the functionality of a particular procedure, but they will not modify these examples to provide added functionality or construct procedures to meet your specific requirements.

MORE INFORMATION

A control containing null information automatically shrinks to nothing and disappears when its CanShrink property is set to Yes, but the space between the controls is not affected by the CanShrink property.

For example, say you have 11 controls in a column of a report, and there is .1 inch of space between each control. Even if all 11 controls contain null information and all 11 have their CanShrink property set to Yes, the space between the controls adds up to 1 inch. When you print the report, even though the 11 controls are not printed, the first control that does contain text will be printed 1 inch lower than you might expect because of all the accumulated space.

A good way to manage the size of your controls is to have as few controls as possible. This will minimize the white space between the controls.

The following example demonstrates how to print mailing labels by using a Visual Basic function to minimize the number of controls and to give you even spacing. Say you want to create mailing labels containing a name, business name, address, city, state, and zip code. You could use several different fields, but it would be better to use a single text box, as in the following step-by-step example.

CAUTION: If you follow the steps in this example, you modify the sample database Northwind.mdb. You may want to back up the Northwind.mdb file and follow these steps on a copy of the database.

More info: http://support.microsoft.com/?kbid=299011